I cannot find my Sharepoint Site in Power Automate

Today I helped a customer setting up a Power Automate Flow that needed to freate a folder in a Sharepoint Library.

When I clicked the dropdown in the flow step the Site was not there… WT?

I entered the URL in Flow and it said that it was able to find the site. When I pasted it into the address bar in Edge it worked perfectly… Hmmm…

After a lot of troubleshooting (aka Googling) I found a forum post that explained that apparently even cloud servers does need a bit of a warm-up stretch to get up to speed- 🙂

Note… I do NOT take any kind of credit for this solution… Just saving it for myself

Links
Re: We are unable to find the site address. Please… – Power Platform Community (microsoft.com)

My top 12 items in the Dynamics and Power Platform 2020 Wave 1

Last week Microsoft finally released the complete PDFs with new features of Dynamics 365 and PowerPlatform Wave 1 2020. I browsed through them (all 405 pages of them 🙂 ) to to try to understand where we are going… here are my top 10 12.

  1. Mass deployment of the Warehouse App
    This gives an organization the ability to use Microsoft Intune (or your favorite MDM solution) to deploy the warehouse app to mobile devices.
  2. The UI will start adapting to the license the user has assigned in order to make the UI “less complex”. This means that there is no longer a possibility to get by under licensed”.
  3. The new grid now allows you to group rows based on a column and also to easily rearrange the columns.
  4. Tables, Entities and Aggregate measurements can be stored in Data Lagke Storage Gen 2. Prior to this release we were only able to store Aggregate Measurements in Data Lakes.
  5. The ability to embed a Power Automate Flow directly in the UI in Dynamics. This flow can be triggered by the end user. This feature is even cooler since it was suggested on the Dynamics Ideas site.
  6. Azure AD sign-in in the POS client. This could previously only be done using a worker ID
  7. The ability to create a PowerApp directly in Microsoft Teams.
  8. Great improvements for running model-driven apps offline. Really cool since this is geared towards mobile front line workers.
  9. Monitor and get insight into usage of your canvas apps using Azure Application Insights.
  10. Power Apps Test Studio is available in General Availability. This gives you the possibility to automate testing and integrate it into Azure DevOps release and Build Pipelines
  11. Simplified expressions in Power Automate. Instead of having to write a complex expression for a string operation there are ready-made blocks for this.
  12. Copy and Paste in the Power Automate designer (Yay)

As you can see this selection of features are quite tech/IT heavy… There are a LOT more app related features in the Wave 2 release. Look through the PDFs linked below to get a grasp on these.

One thing to note is that this is Wave 1… Not everything in Wave 1 is general available or in some cases even in preview… but it is coming. Something to look forward to.

Links:
https://docs.microsoft.com/sv-se/dynamics365-release-plan/2020wave1/
https://docs.microsoft.com/sv-se/power-platform-release-plan/2020wave1/

Flow Friday: Getting random row from Excel

Finally back for Flow Friday after some much needed rest over the holidays. This week is sort of a proof of concept. There are times when you need to just get a random value. This could be for a lottery or get a random name for the person that should take out the trash this week.

  1. Create an Excel Sheet in OneDrive with a table containing all of the names you need to randomize
  1. Go to Microsoft Power Automate and create a new flow
  2. Since I want it to run automatically I set it on a schedule
  1. Next we read the Excel file and figure out the number of rows
  1. We then create a variable that is a random number between 0 and [number of rows in the table]
Formula: rand(0,int(length(body(‘ListRows’)?[‘value’])))
  1. Then we get the name column form the row with the random number
Formula: body(‘ListRows’)?[‘value’]?[variables(‘RandomRow’)]
  1. Finally I sent the name in a notification
outputs(‘Compose’)?[‘Name’]

That is all… I will now get a notification with the name of the person that will take out the trash 🙂

Flow Friday: Posting Azure VM Auto Shutdown notifications to Microsoft Teams

When you have Azure VMs up and running there is a function to auto shut them down when they are not being used. You can do that in a couple of ways. One of the newer ones is to use the Azure DevTest Labs functionality to do this. Half an hour before the VM is shut down Azure sends an email to a pre-defined adress where you have the option to post-pone or cancel the shutdown.

Today one of my colleagues asked me if it was possible to get this email, with the links, into Teams. My first thought was to send it to the Teams Channel email. Unfortunately did not display correctly…

My next try was to use the Webhook in DevTest Labs functionality and the incoming webhook connector in Teams. When I did this the message did not look very “user friendly”

So I thought I would give Power Automate a try. I set up DevTest Labs to send the email to my mailbox. The I creating a trigger for an incoming email and with a filter for the email adress that Azure DevTest Labs user

The I add a block posting to Teams Channel. In order to get it to work I had to cut down the message to size. I used the title tag in the email and the phrase “Note that” at the end of the message to cut away the beginning and the end of the message body to fit the message in the Teams post.

The Expression:
substring(triggerBody()?[‘Body’],indexOf(triggerBody()?[‘Body’],'<H1′),sub(indexOf(triggerBody()?[‘Body’],’Note that’), indexOf(triggerBody()?[‘Body’],'<H1′)))

Finally I move the message to my Archive folder.

The message is now in Teams 🙂

Friday Flow: Using Microsoft Forms with Power Automate

At the company where I work we regularly have knowledge transfer sessions called Brown Bag Lunches (BBLs) which I think is a great way to share and give back. I am in charge of scheduling these.

I wanted automate the process for planning these sessions and give my colleagues a way to submit suggestions for content. I started by setting a simple Microsoft Form for them to add suggestions

Sorry about the Swedish 🙂

Microsoft has a page for looking at the results of the form submissions which I could have used to get the subjects and plan them manually… but where is the fun in that :-). My solution was to add a flow that is triggered every time a form is submitted which adds it to an excel spreadsheet and adds a todo task in my todo list of choice Todoist.

The result from Forms is in a JSON format so the first thing we need to do is to parse the JSON message.


The parsing of the JSON also means that we can use the content as dynamic content and add it without having to write an expression… the No-Code way. The JSON message also only contains the response id so we will have to use a “Get response details” block to get the actual information of the form.

The reason we are extracting the information is to put it in the Excel file… The response only contains the submitting users email adress so to get the excel file to look a bit nicer I use the Get User Profile block to look up the users real name from the Azure AD/SharePoint. This is a really cool block since it can get a whole lot of cool info from you organization such at a users manager etc.

Finally I add a line to an excel file and put a reminder i my todo list

I would really continue building this logic to automate the planning even further… I might have to revisit this in a later post 🙂

Have a nice weekend

Johan

Flow Friday: Troubleshooting ‘shared_sharepointonline’ doesn’t exist

When trying to build a flow yesterday I got a confusing error:

Unable to process template language expressions in action ‘Create_Sprint_Period_in_Sharepoint’ inputs at line ‘1’ and column ‘2778’: ‘The template language expression ‘json(decodeBase64(triggerOutputs().headers[‘X-MS-APIM-Tokens’]))[‘$connections’][‘shared_sharepointonline’][‘connectionId’]’ cannot be evaluated because property ‘shared_sharepointonline’ doesn’t exist, available properties are ‘shared_office365, shared_todoist’. Please see https://aka.ms/logicexpressions for usage details.’.

The reason for this error is that you are test running the flow using data from a prior test from before you added the missing component (in this case sharepoint). You simply need to trigger the flow again med fresh data and it will work

Johan

Flow Friday – Troubleshooting Tips

This weeks Flow Friday is a bit late… Sorry…

Sometimes it can be a bit tricky troubleshoot flows… espesially if you are not fluent in JSON (I’m not). Trying to figure out exactly how to write the formula might sometimes require a couple of tries and my first solution to this was to send my self an email.

There is a better solution… You can use the compose function to get everything working. Just add the function you want to test in the Compose Window

The formula I added was this one

adddays(triggerOutputs()[‘body’][‘date’],1,”)

I am just trying to add one day to a date field that I input manually in the previous step.

When you have run the Flow you can just look in the run history for the output of the compose step

Flow Friday – Feeding news to MS Teams – Part 2

So… Apparently Flow is not Flow anymore 🙂 Flow is now called Power Automate but since the actual flows still are called flows I will keep the name Flow Friday…

Last week we startad posting news to Microsoft Teams… today we are expanding that concept… Same basic flow with a nice look and more news sources

Since we are not able to add multiple trigger to a Flow (yet?? *hoping*) and I am too lazy to build multiple flows… that would be cheating.

The multiple news sources requires a workaround using an external service called RSSUnify (there are other services that you can use). Go to RSSUnify and add all your feeds.

Then you copy the resulting RSS URL from RSSUnify and add it to Microsoft Flow

In order to refine the flow even more I want to make the Teams posting a little nicer. To do that I use the action “Post your own adaptive card as the flow bot to a channel (Preview)”. To design the look of the card you can either write your own JSON design or you can use this tool. I created a minimal card and the post information.

The card posting action has issues handling HTML which means that I will have to convert the summary into Plain Text. In order to fix this I add an action called Html to Text and then add the result to the adaptive card.

{
    "$schema": "http://adaptivecards.io/schemas/adaptive-card.json",
    "type": "AdaptiveCard",
    "version": "1.0",
    "body": [
        {
            "type": "TextBlock",
            "text": "[@{triggerBody()?['title']}](@{triggerBody()?['primaryLink']})",
            "weight": "Bolder",
            "size": "Medium"
        },
        {
            "type": "ColumnSet",
            "columns": [
                {
                    "type": "Column",
                    "width": "stretch",
                    "items": [
                        {
                            "type": "TextBlock",
                            "spacing": "None",
                            "text": "@{body('Html_to_text')}",
                            "isSubtle": true,
                            "wrap": true
                        }
                    ]
                }
            ]
        },
        {
            "type": "TextBlock",
            "text": "",
            "wrap": true
        }
    ]
}

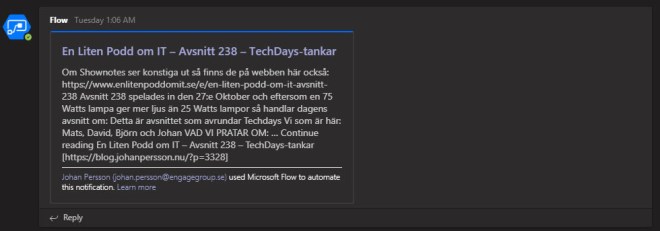
The post looks like this:
That is it for this week

Links:
https://adaptivecards.io/
https://rssunify.com/